· 8 min read
Dried flowers and leaves in your journal or album
A violet from the garden or a leaf from a walk: how to press nature, fix it in place without it breaking, and keep your photos safe.
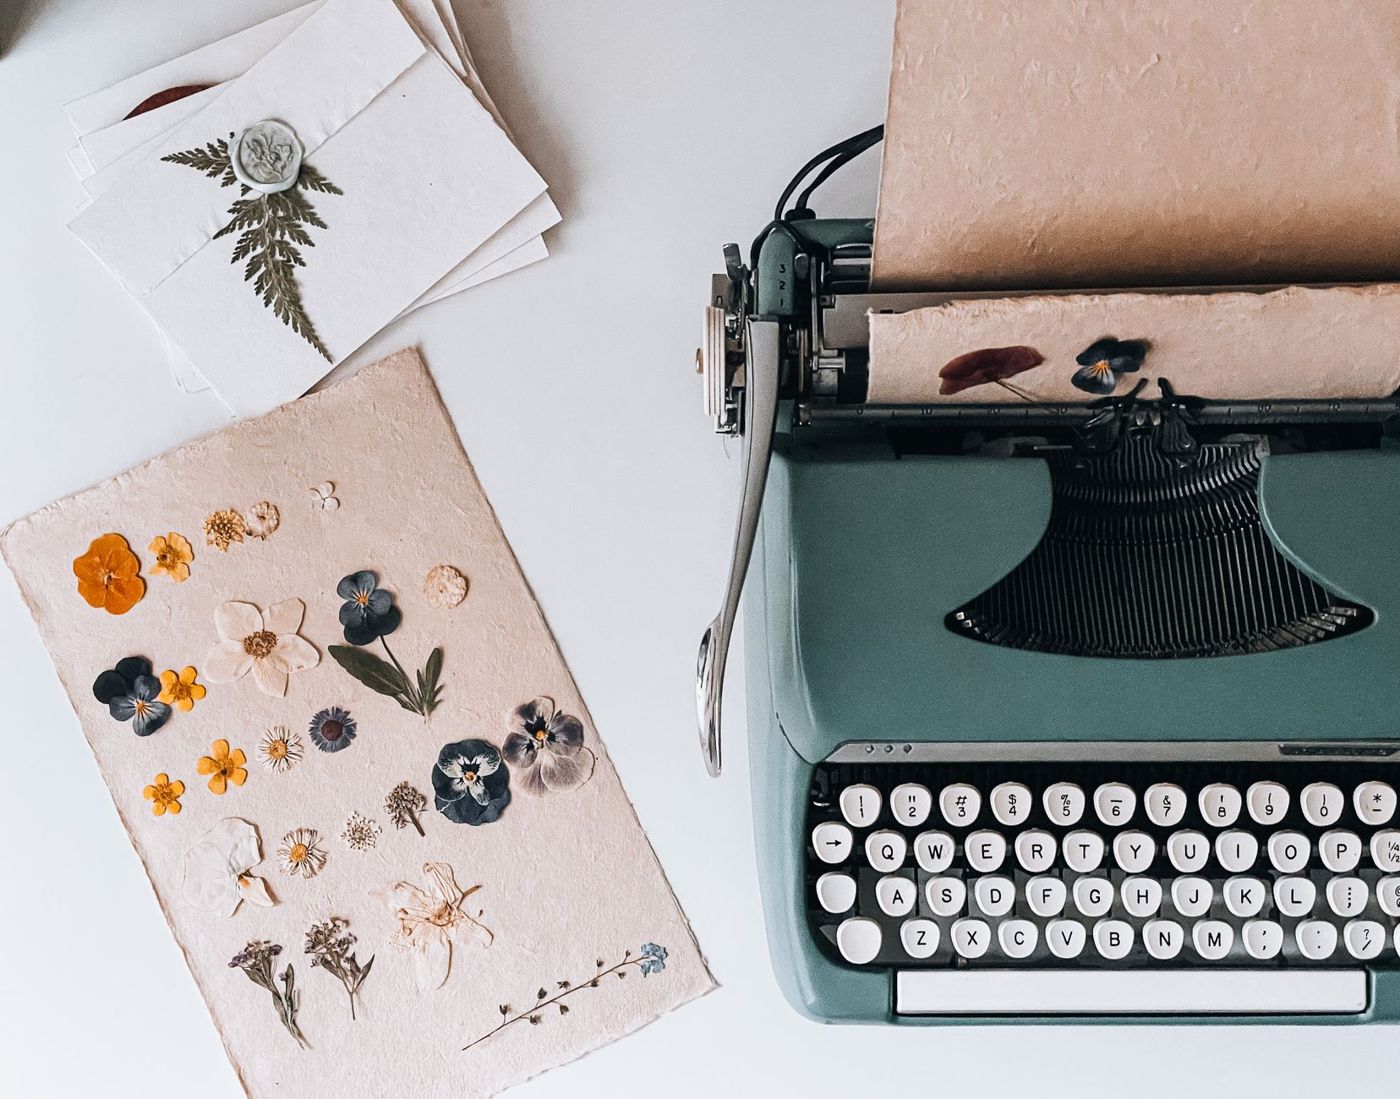
A violet from the garden, a leaf from a walk in the woods, the little flower from the bridal bouquet. Nature on a page gives you something paper can't: it's real. It's also fragile. With a few habits it stays beautiful, and the rest of your book doesn't suffer for it.
Which flowers and leaves work well
Flat is your best friend. Flowers with thin, open petals dry neatly and lie flat on the page later. Think violets, forget-me-nots, buttercups, daisies, small anemones, fine grasses, fern fronds and loose petals.
Thick flower heads such as roses, peonies or a whole tulip are trickier. They dry unevenly, hold on to moisture for a long time and make your book bulge. Pull them apart and press the petals separately, or choose a bud instead of the full flower.
Pick on a dry day, once the dew has gone and the flower has just opened. A wet flower, or one that's past its best, turns brown and limp. And in the wild, only pick what you're allowed to: nature reserves and verges sometimes have protected species. Your own garden, a bunch of flowers from the market or a bouquet you were given is always safe.
Pressing flowers in a book
The simplest method is also the best. You need a thick, heavy book you can do without for a while, and paper that absorbs moisture.
- Lay a sheet of blotting paper, kitchen roll or uncoated printer paper on a page of the book. Baking paper works too and won't stick to the flower, but it doesn't absorb moisture.
- Place the flowers on it without letting them touch. Arrange the petals the way you want to see them later; you can still do that now.
- Put a second sheet of paper on top and close the book.
- Add something heavy on top: a few other books, or an iron that's switched off.
- As a guide, leave it for one to three weeks in a dry place, until the flowers feel papery. Change the paper after a few days if it feels damp.
The paper matters. Without a layer in between, moisture seeps into the pages of the book and can stain them. So don't use a book you treasure.
If you press often, you can make or buy a flower press: two boards with screws at the corners and layers of cardboard and blotting paper in between. The principle is the same, just more even and faster. There are also methods using the microwave or an iron. They're quick, but there's a bigger chance your flower burns or discolours. Try it first with a flower you're not attached to.
Is it really dry
This is where things often go wrong. A flower that looks dry on the outside can still hold moisture at its centre. You only notice once it's been in your album for a few weeks.
A properly dry flower feels papery, no longer bends limply and doesn't feel cool against your skin. If in doubt, leave it for another week. That costs nothing, whereas a flower stuck in too early can cost you a page.
Will the colour last
Honest answer: not completely. Every dried flower changes colour. Some get lighter, others darker or a bit browner. Blue, purple and yellow generally last longest. Red often darkens, and white and pink can yellow or turn brown.
A few things do help:
- Dry quickly. The faster the moisture is out, the more colour you keep. Change the paper in good time.
- Store in the dark. Light is colour's biggest enemy. An album kept closed in a cupboard stays lovely for longer than a journal lying open on the windowsill.
- Accept it. That soft, faded look suits a vintage or natural page perfectly. Many scrappers prefer it to the bright fresh colour.
If you really want to capture the original colour, take a photo of the fresh flower and stick it alongside.
Fixing them in place without breaking or slipping
Dried flowers are brittle. Every time you open and close the book, they rub against the facing page. So choose a method that suits your book.
- A thin layer of glue. Spread the glue on the page, not on the flower, and gently lay the flower in it. A glue that dries clear works best. Thick blobs leave marks.
- Clear tape. A strip over the stem holds a flower in place without you having to glue it down completely. Washi tape (thin Japanese paper tape) works too, and looks lovely if you want the tape to show.
- A little window. Cut a circle or rectangle out of your page, cover the hole with clear tape or film on both sides and put the flower in between. That way you can see it from both sides. Draw the cutting line in pencil, not pen, so you can rub it out without damaging the paper.
- Self-adhesive film or laminating. Lay the flowers on the sticky side of a piece of book-covering film and put a second piece over the top, with a border of a centimetre or two. They can't slip any more and hardly break. A laminated little flower in a cut-out window is also a nice solution for a card.
- A coat of varnish or decoupage glue on top. This strengthens the flower and gives it a glossy, almost laminated look. It works well on a bookmark or a cover, but it is permanent.
- A small envelope or pouch. For the really fragile things, like a rose petal from a bouquet, a small glassine envelope or a clear pouch in your album is safest. You can take it out and look at it without it rubbing against other pages.
A tip that makes a big difference: put a sheet of blotting paper or thin translucent paper opposite the page with flowers. Then they won't rub against the next spread.
Natural material and acid
Flowers and leaves aren't archival material. Plant matter contains acids and lignin, the substance that also makes paper yellow. Over the years they can discolour and leave stains on the paper underneath.
In your journal that's usually not a problem. It's part of its character. In an album with photos, it's wise to keep some distance.
- Don't let flowers touch photos. Stick them next to the photo, not on it or under it.
- Ideally, put them on a separate piece of cardstock (sturdy, thick paper) that acts as a buffer.
- Place hard or pointed things, such as shells or twigs, so they can't scratch the photos when you close the album.
- For the rest of the page, choose acid-free paper and photo-safe glue, as you always would.
Preventing mould and rot
Mould is almost always caused by moisture: in the flower itself or in the room where your book is kept.
- Only stick in what's completely dry. A flower that still holds moisture will rot or go mouldy in a closed book.
- Fresh flowers or berries don't belong in an album. Nor do thick stems, seed pods and fleshy leaves, unless they've been thoroughly dried.
- Keep your book in a dry place with an even temperature. Not in a damp cellar or a cold attic.
- Look between your pages now and then. If you see white or green fluff, take the flower out straight away and let the page air. Tiny creatures, such as booklice, love plant matter too.
Rather not use a real flower? Scan or print it
Sometimes a real flower just isn't a good idea. In an album meant to last for generations, next to photos you don't want to risk, or in a book that's handled a lot.
In that case, lay the pressed flower on the glass of your scanner with a white or black sheet over it. The result is surprisingly detailed: you can see every tiny vein. You can print that scan on nice paper, cut it out and stick it in like any other picture. You can also shrink it, repeat it or use it as a background.
A photo of the fresh flower works just as well, and has the advantage that the colour is right. That way you get the best of both worlds: the real flower safe in an envelope, and the image free on the page.
A few ideas to get you started
- A herbarium page: one species per page, with the name, the date and where you found it, in your own handwriting.
- A seasonal page with whatever you bring home from the garden or a walk in a month.
- The little flower from a wedding or funeral bouquet in a window next to the card from that day.
- Handmade paper: dried petals stuck between two layers of thin tea bag paper give a slightly translucent sheet with a character of its own.
Start with a few violets from the garden and a thick book. In a few weeks you'll know exactly how they turn out.
Questions about this topic
How do you dry and press flowers for a journal?
Place the flowers between blotting paper or kitchen roll in a thick, heavy book, without letting them touch, and put something heavy on top. As a guide it takes one to three weeks; change the paper after a few days if it feels damp.
How do you know when pressed flowers are fully dry?
A properly dry flower feels papery, no longer bends limply and doesn't feel cool against your skin. If in doubt, leave it for another week.
How do you stick dried flowers in without them breaking?
Use a thin layer of glue on the page (not on the flower), a strip of clear tape over the stem, or a little window with tape or film on both sides. For very fragile flowers, a small envelope or pouch is safest.
Can dried flowers damage photos?
Yes. Plant matter contains acids and lignin and can discolour and cause stains over the years. So stick flowers next to photos rather than on or under them, and ideally put them on a separate piece of cardstock.