· 6 min read
How to make and swap artist trading cards
A tiny piece of art the size of a playing card, made to give away and get one back. Here's how to make your first artist trading cards and find someone to swap with.
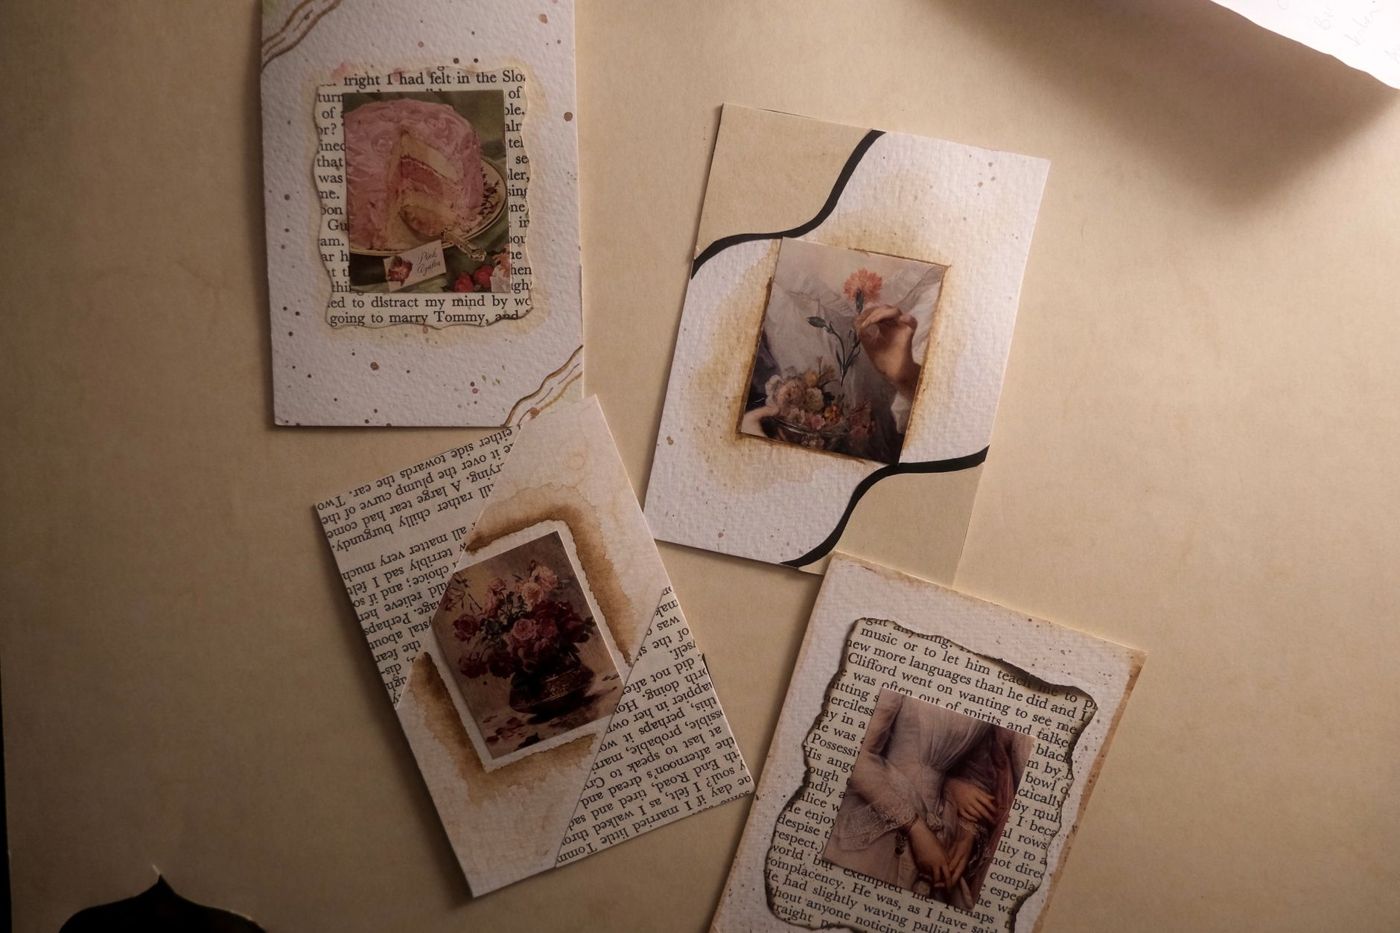
An artist trading card, or ATC for short, is a miniature artwork the size of a playing card. You don't make it to keep, but to swap with another scrapbooker or artist. That small size is exactly what makes it so easy to start: you can finish one in half an hour, and if it goes wrong, you've lost almost nothing.
What exactly are ATCs
ATCs as we know them today come from the art world of the late nineties. A Swiss artist organised swap sessions in Zurich where people exchanged handmade cards with each other. The idea spread quickly, first through swap evenings and later through the internet and the post.
Artists had been making small pieces to swap or to introduce themselves for much longer. What was new was the fixed size. It was borrowed from baseball cards and other trading cards, which is why ATCs fit in the same sleeves and folders.
ATC or ACEO
You'll also come across the term ACEO. It stands for Art Cards, Editions and Originals. The size is exactly the same, but the purpose is different: an ACEO is made to be sold. It can be an original or a print in a small, numbered edition.
An ATC is something you swap or give away. If you want to sell your cards, call them ACEOs. That way everyone knows where they stand.
The two basic rules
There are really only two rules that everyone sticks to.
- The size is 6.4 x 8.9 cm, or 2.5 x 3.5 inches. Portrait or landscape are both fine, but the size itself is fixed. A card that's bigger or smaller isn't an ATC.
- You don't sell them. ATCs pass from hand to hand, as a swap or as a little gift.
On top of that, there are habits most swappers follow. An ATC is handmade and one of a kind, or at most part of a small series. A ready-made print that you just cut out doesn't count. And the card has a sturdy base, usually cardstock (firm, plain card), so it doesn't bend in a sleeve or envelope.
What to make them from
Start with a sturdy sheet and cut a few base cards from it at the right size. Watercolour paper of around 300 gsm is lovely if you're working with water or paint. For collage, plain cardstock or the card from a cereal box will do.
After that, almost anything goes. A few ideas that work well at this size:
- A scrap of an old book page as a background. Pick a page with a nice typeface or notes in the margin, and use only a small part of it.
- Packaging: the printed side of a tea box, a logo or a row of numbers, and the grey inside of cardboard too. A small piece is enough.
- Stamps, washi tape, old postage stamps, a button or a bit of lace.
- A distress ink background: press some ink onto a smooth plastic mat, spritz it with water until it beads, and drag your card through it. Let it dry and repeat until you like it. Then stamp a motif in a contrasting colour.
- A small print of one of your own photos, cut into the shape of a postage stamp.
- Single words from a poem or magazine, cut into strips.
Designing at a small size
At 6.4 by 8.9 cm, leaving things out matters more than adding them. Choose one subject and give it room. Place it in the centre or on one of the points where the lines cross if you divide the card into thirds, both lengthways and widthways.
Stick to three or four colours and leave a calm area empty. Work from back to front: background first, then the middle layer, and only then the lines and details. Lots of scrapbookers make a background first and only decide what goes on it once it's dry.
Foam tape or 3D foam pads under the main motif give you depth. Use them sparingly, as an ATC still has to fit in a sleeve. A dark edge, sponged with ink all the way round, finishes the card off.
A handy habit: cut ten base cards at once and finish them as a series. You only have to get your things out once, and after ten you can really see your progress. Even if you can't draw, stencils, stamps and masking tape will get you there.
If you make several cards that belong together, that's called a diptych (two cards), a triptych (three) or a series. You note that on the back as well.
What to put on the back
The back is your ATC's calling card. Whoever receives it will want to know who it's from. At the very least, put:
- your name, or the name you swap under
- the title of the card
- the date and, if you like, the place
- a way to reach you, such as an email address
- for a series: the number, such as 2 of 3
Some swappers number all their cards in sequence, so they can keep track of how many they've made. You can handwrite the back, stamp it or stick on a small label. Use a pen that doesn't smudge or show through.
How swapping works
There are two ways to swap: in person or by post. At a swap session, you lay your cards on the table and swap with whoever you like. That could be at a crafting afternoon, a craft fair or with a few friends.
By post, it usually happens through a group or forum. There's a theme, such as autumn, birds or a stack of books, and a deadline. Often one person collects all the cards and sends everyone the same number of different ones back. You can also arrange a swap directly with someone: you send two, they send two back.
A few things to keep in mind:
- Only send cards you'd be happy to receive yourself. Swapping works on trust.
- Stick to the theme and the deadline.
- Pack an ATC in a sleeve or between two pieces of card so it doesn't bend. Chunky embellishments can make the envelope too thick for a standard letter, so check that before you post it.
- If you're nervous, start with one swap with someone you know.
Storing ATCs
Once you start swapping, you'll soon have a little pile. Because they're the same size as trading cards, they fit in the pocket pages made for those, with nine pockets per sheet. That way you can see the front and slip the card out to read the back. Choose sleeves made of polypropylene or polyester, without PVC.
You can also make your own storage box or folder, for example with a concertina fold and a row of paper pockets that each hold one card. A half-moon cut from the top edge of each pocket makes it easy to take them out. Make a test version from thin paper first before you cut into your nice paper.
If you'd like to show your collection to people who live far away, scan the front and back together. That way you've also kept a record of who each card came from.
Questions about this topic
What is an artist trading card?
A miniature artwork the size of a playing card, which you don't make for yourself but to swap or give away. You make it by hand, often with collage, stamps or ink.
What's the difference between an ATC and an ACEO?
The size is the same, the purpose is different. You swap or give away an ATC, while an ACEO (Art Cards, Editions and Originals) is meant to be sold.
What size is an artist trading card?
6.4 x 8.9 cm, or 2.5 x 3.5 inches, portrait or landscape. A card that's bigger or smaller doesn't count as an ATC.
What do you put on the back of an artist trading card?
Your name or swap name, the title, the date and a way to reach you, such as an email address. For a series, you also add the number, such as 2 of 3.