· 7 min read
How to make a mini album: base, pages and binding
A small album about one trip, one day or one person. Here's how to choose a base, work out how much paper you need and fit everything in with flaps and tags.
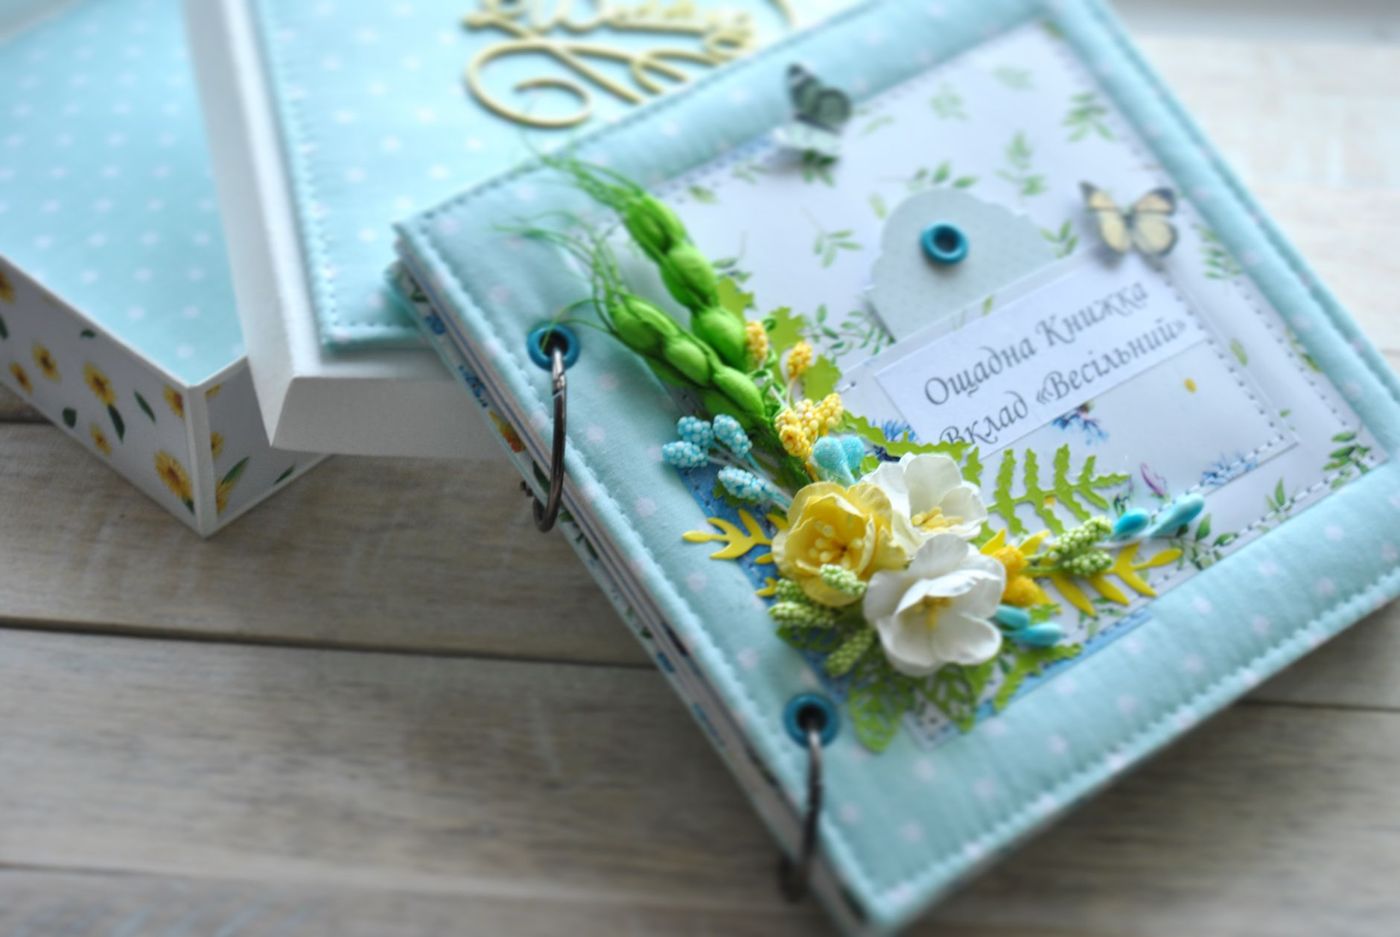
A mini album is a small book about one thing: a weekend by the sea, a first birthday, a friendship, the month of December. It's smaller than a regular album, has fewer pages and so it's finished sooner. That's exactly what makes it so nice. After a few evenings you're holding something you can leaf through, give away or put on your shelf.
What is a mini album and what do you use it for
A mini album is usually 15 x 15 cm or smaller, but 10 x 15 cm, A6 or a narrow format are common too. The story has clear edges. You choose one subject and a handful of photos, and you don't have to catch up on years.
It works well for:
- a holiday or a day out;
- a party, a birth or a wedding;
- a gift, for example for hosts or grandparents;
- a season or a month;
- small moments from everyday life that don't fit anywhere else.
For your first mini album, five to eight photos are enough. That keeps it manageable and leaves room for writing and small keepsakes such as tickets.
Which base to choose
The base decides what your album looks like and how much work it is.
- Chipboard or sturdy card: thick, stiff board for the cover, covered with patterned paper. You can cut it to size yourself from leftover board. Choose board at least 1.5 mm thick and avoid pieces with dents or creases. Cut the paper a good centimetre larger than the cover all round, snip the corners at an angle and fold the edges over, as you would when wrapping a present.
- Envelopes: glue the flap of one envelope to the inside of the next and you have an album with built-in pockets. Keep it to four or five envelopes, otherwise they start to go crooked and the album gets too thick.
- Paper bags or flattened cardboard tubes: cheap, and the open ends become pockets for tags all by themselves. Flatten them well with a bone folder before you cover them.
- A single sheet of patterned paper: by cleverly folding and cutting a 30.5 x 30.5 cm sheet, you can make a little book with tuck-in pockets, without any extra board.
- Ready-made: a shop-bought mini album or a kit with a base that's already bound. Then all you have to do is fill it. Ideal if you mostly want to stick things in rather than fiddle with the construction.
An accordion album, one long strip folded in a zigzag, is also a good start. It stands open on a shelf, you don't need any binding and it's quick to make.
Work with one paper collection, or with papers from the same colour family. That way the pages naturally go together and you have fewer choices to make per page.
How many pages and how many sheets of paper
Work backwards from your photos. A 15 x 15 cm page fits one 10 x 15 cm photo with a bit of space around it, or two smaller ones. Count your photos, decide which ones can share a page and add the front and back.
A simple sum: one 30.5 x 30.5 cm (12 x 12 inch) sheet gives you four leaves of about 15 x 15 cm. Each leaf has two sides. If you want sturdier pages, glue two leaves of patterned paper back to back. Cardstock, sturdy plain card, is already strong enough as a single leaf. With patterned paper glued double, you get two sturdy leaves per sheet, so four sides to fill. With cardstock you get four leaves per sheet, so eight sides.
An example: ten photos, four of which you pair up, give eight sides with photos. With a title page and a closing page that makes ten sides, so five leaves. For that you'll need about three sheets if you glue patterned paper double, or two sheets of cardstock. Allow some extra patterned paper to cover the leaves.
Cut your pages slightly smaller than the cover, about half a centimetre, so they don't stick out. Make a template from a piece of scrap paper first to try out the size.
Rings, binding or sewing
Choose the binding based on how often you want to make changes and how thick the album will get.
- Rings: the easiest. Punch two or three holes in the cover and pages and thread binder rings through them. You can add or move pages later. Mark the holes with a template made from scrap board, so they're in the same place on the cover and pages. Ribbon or string through the holes works too.
- Accordion spine: a strip of cardstock folded in a zigzag; scoring it first gives you crisp folds. You glue the pages into the valleys. This spine makes a sturdy little book that opens all the way.
- Sewing: fold your leaves in half, nest them inside each other and sew them through the fold with strong thread, using three or five holes. This feels the most like a real book. You can read how to sew several folded leaves (signatures) together in our article on bookbinding at home.
- A wire binding machine gives you a spiral spine, like a notebook, and the album will often lie flat when open.
Whatever the binding, make sure the spine is wide enough for everything that will go in later. An album with photos, tags and embellishments gets much thicker than the empty pages. Try out the binding with scrap paper first, before you use your nicest sheets.
Fitting everything in with flaps, tags and fold-out pages
The small size is also a challenge. You want to include more than fits on a page. There are tricks for that, which give you room without making your album twice as thick straight away.
- Flaps: a strip of paper glued down on one side that you fold out sideways or upwards. Underneath, there's room for another photo or some writing.
- Pockets with tags: glue a piece of paper down on three sides and you have a pocket. A tag that sticks out just a little at the top is easy to pull out. You write the story on the back.
- Tip-ins: a loose sheet attached to the edge of a page with a narrow strip, so you can turn it like a half page.
- Bands: a strip of paper or ribbon running across the page, so you can slide a card or photo behind it.
- Fold-out pages: a page that's wider than the album and folded twice. When you open it out, you have three pages side by side for a panorama photo or a row of small photos.
A few things to keep in mind. Put heavy or chunky embellishments near the edges or on the cover, not in the middle of a page where the book closes. Alternate busy pages with calm ones. And check every few pages that the album still closes. A ribbon on the back, glued under the cover paper, holds a thick album together.
How long does a mini album take
That depends a lot on the base and how much you decorate. An envelope album or a ready-made base with a few photos can be done in an afternoon or evening. An album you build entirely yourself, with a covered cover, an accordion spine and lots of flaps, is more likely to take a few evenings or a weekend. Fold-out pages and pockets need more measuring and scoring, so they take more time too.
You can easily split the work up:
- Choose and print your photos.
- Make the base and binding.
- Stick down the backgrounds and photos.
- Write the text.
- Decorate and finish.
That way you can do one step per session. Stick down the backgrounds first, then the photos, then the layers and finally the small details. Lay everything out loose before you glue anything down. At the end, leaf through the album from front to back to see if it all hangs together.
A mini album doesn't have to be perfect. A slightly crooked spine or a flap that isn't quite straight fades away as you leaf through, next to the story it holds.
Questions about this topic
How many pages does a mini album need?
Work backwards from your photos: a 15 x 15 cm page fits one 10 x 15 cm photo or two smaller ones. For your first album, five to eight photos are enough.
What can I use as a base for a mini album?
You can make a mini album from chipboard, envelopes, paper bags, a folded sheet of patterned paper or a ready-made base. A ready-made album is the simplest, because all you have to do is fill it.
How do you bind a mini album?
Rings are the easiest: punch holes in the cover and pages and thread binder rings through them. For a real little book, you can make an accordion spine or sew the leaves.
How do I fit more photos into a small album?
Use flaps, pockets with tags, tip-ins, bands or fold-out pages. That gives you extra room without making the album much thicker.