· 7 min read
How to make your first junk journal, step by step
An exercise book or old cover, a box of paper and an afternoon. This is how you make your first junk journal, without it having to be expensive or perfect.
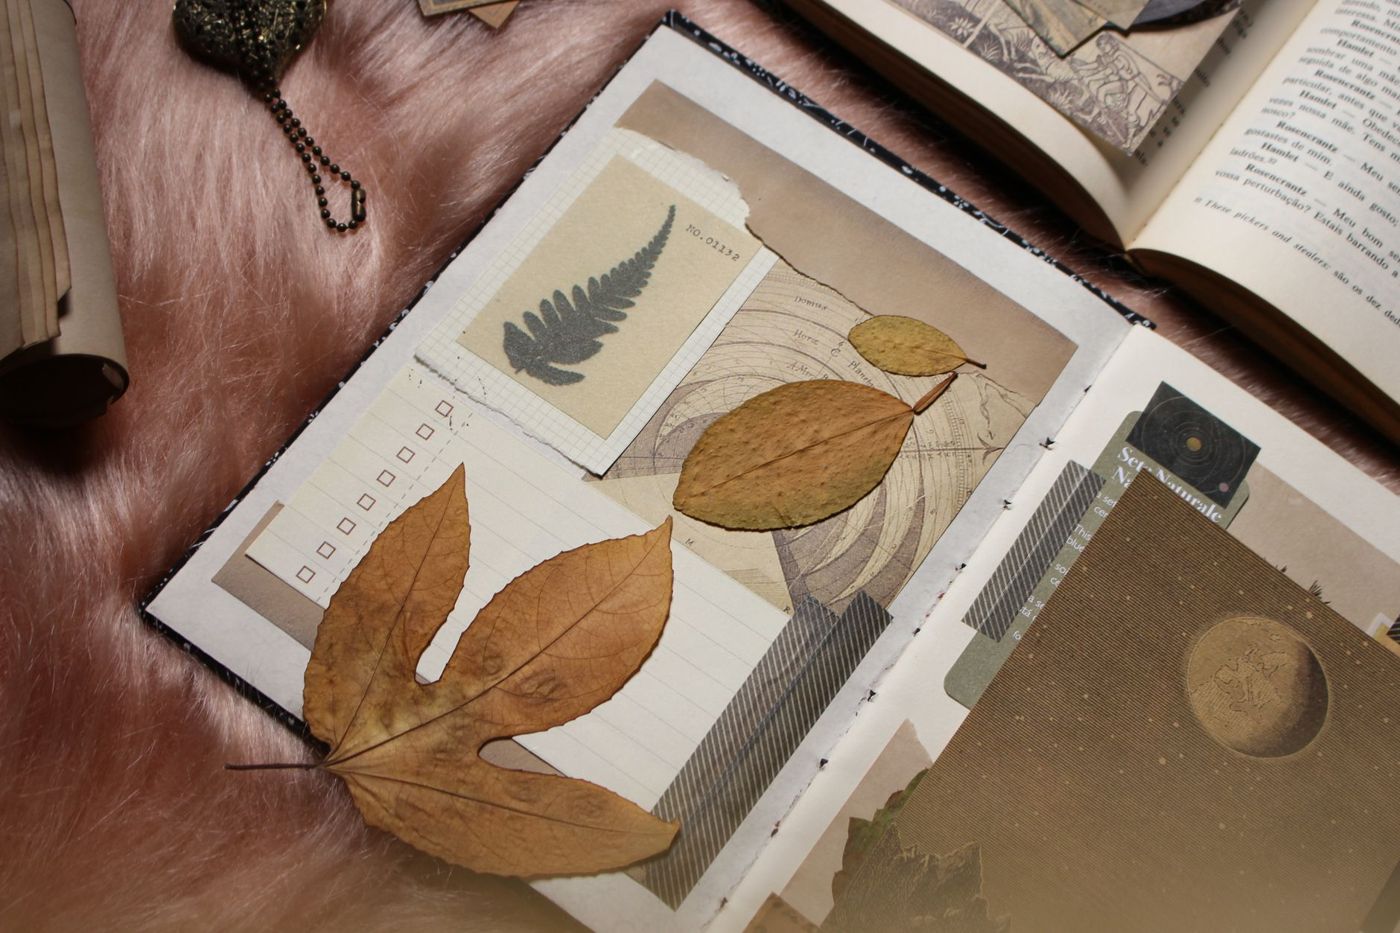
A junk journal is a book you put together yourself from paper that would otherwise have ended up in the bin. For your first one you don't need much: a base, a pile of 'junk', something to stick things down with and a quiet afternoon. Below you'll read how to go about it, from choosing a book to the last envelope you glue in.
Choose a base that suits you
There are three common starting points. None of them is better than the others. It depends on how much crafting you want to do before you can start sticking.
- An exercise book or notebook. This is the easiest start. A plain book of A5 or larger is nice to work in, and a book that has been lying unused in a drawer for years is ideal. Glue in background paper and layers, and it soon looks like a handmade book.
- An old hardback book. Take out the pages and hang your own handmade signatures in the empty cover. A cloth cover or an old title gives the book instant character. You can also leave the pages in and work on them, but then you'll need to make room (more on that further down).
- Folded signatures in a cover of your own. You fold paper, sew it into signatures and make a cover from sturdy card, a cereal box or a biscuit box. This is the most work, but you decide the size and the paper entirely yourself.
You'll also see journals with rings, where you can move loose pages around, or with elastic bands in the spine, like a traveler's notebook, where you can swap signatures. Keep it simple for a first book: one exercise book, or one cover with two or three signatures.
Start with a loose direction
An empty book can feel paralysing. A theme helps you get going: a season, a trip, your garden, old letters or everything in blue and brown. It doesn't have to be a strict plan.
A few colours that keep coming back hold the book together, even if every sheet comes from somewhere different. That way it will later feel like one whole, not a pile of separate experiments.
What to collect and where to find it
By 'junk' we mean anything made of paper or fabric that you'd normally throw away, but that is pretty or holds a memory. Set out a box or folder and, for a few weeks, put in everything you come across.
- Envelopes, including ones with a window or a stamp
- Train, museum or cinema tickets, menus and receipts
- Old greetings cards and postcards
- Pages from discarded books and dictionaries, sheet music and maps
- Magazines, wrapping paper, used tissue paper, napkins and coffee filters
- Packaging with a nice print, paper bags and card
- Leftover ribbon, lace, fabric, buttons and string
- Leftover patterned paper (paper with a print) and stickers you never use
Look at home first, then further afield. Charity shops, flea markets and book markets often have old illustrated books for very little money, such as school books about plants and animals. Ask the people around you too: a grandmother or neighbour might still have old letters, cards or sewing patterns lying around. If you're short of something, you can print copyright-free images.
Do watch out with till receipts. They're often printed on thermal paper and fade after a while. Write the most important bit next to it if you want to remember the receipt.
How to make a signature
A signature is a small stack of folded sheets sewn together through the middle. Feel free to mix types of paper: a sheet of drawing paper, a book page, an envelope, a piece of kraft paper.
- Take four or five sheets, for example A4 sheets folded in half to A5. That gives you eight to ten leaves per signature. Fold smaller sheets in with them; they'll naturally become in-between pages.
- Fold the sheets in half together and press the fold flat with your thumb or a ruler.
- Place the signature next to your cover. The sheets should be slightly smaller than the cover, so that nothing sticks out.
- Make a piercing guide: a folded strip of paper with three holes, one in the middle and two a few centimetres from the top and bottom. Lay it in the fold and pierce through all the sheets with an awl or thick needle. Pierce the same holes in the spine of your cover. If you're using more signatures, each signature gets its own row of holes in the spine.
- Sew through the signature and cover at the same time, using strong thread (waxed thread works best). Start on the inside at the middle hole and go out. Come back in through the top hole, run along the inside to the bottom hole and go out there again. Finally, go back in through the middle hole. Lay the two ends either side of the long stitch and tie them firmly.
If you don't want to sew, you can also staple a signature through the fold. You can also glue the signatures into the spine of an old book with a strip of fabric or paper, or put the pages in a ring binder.
Filling the pages
Start with backgrounds. Glue a book page, a piece of map or wrapping paper onto a bare page. Then build up layer by layer, with different sizes and textures.
- Lay everything out loosely first and move things around until you're happy. Take a photo before you start gluing, so you remember how it was arranged.
- Tear edges instead of cutting them. A torn edge looks softer.
- Make pockets from half an envelope or from a strip of paper glued down on three sides. Glue only the edges, or the pocket won't open any more.
- Tuck tags, tickets or a folded note into those pockets.
- On every spread (two pages side by side), leave a little space to write something, even if it's just a date or one sentence.
Use a glue stick or double-sided tape and go easy on wet glue, because it makes thin paper wrinkle. Put a sheet of scrap paper under your page to catch any excess glue. Let everything dry properly before you close the book.
Can it be messy
Yes. The beauty of a junk journal is exactly that it isn't polished: different kinds of paper, wonky edges, a coffee stain, colours that don't quite match. If you're used to wanting everything perfect, this is where you'll discover that a blotchily dyed piece of fabric or an uneven edge gives the book character.
Do look at other journals for ideas, but don't hold your own page up against them. Your first book is a practice book. Start with a few pages, see what you enjoy and let your style develop on its own. The book gets more beautiful the more it holds.
How to stop it getting too thick
Every scrap of paper, ribbon and ticket makes the book thicker. Often you only notice when the cover won't close any more. These things help:
- Make room before you start. In an existing exercise book or old book, tear out a few leaves every few pages, or glue a few together. Keep the torn-out pages for another project.
- Keep your signatures thin. Four or five sheets per signature is enough.
- Make the spine of a handmade cover a little wider than your stack of signatures, so there's room for what gets added.
- Spread bulky things, such as buttons, folded cards and fabric, across the whole book rather than piling them onto one spread. Ideally keep them away from the spine.
- Choose flat materials more often, such as tissue paper, napkins and thin book pages.
- Close the book with a ribbon or elastic band. A bit of bulge is part of it.
A junk journal on almost no budget
You don't need to buy anything to get started. You don't need a kit, or a bundle of printables. This is enough:
- an old exercise book, or a cover made from a cereal box
- a needle and strong thread, or a stapler
- scissors and a glue stick
- a box of collected paper
Use what you already have: stickers you thought were too nice to use, leftover washi tape (decorative paper tape), ribbon from presents and the children's drawings. If you do want to print something, choose copyright-free images and print them on slightly thicker paper. On thin printer paper they quickly look washed out and wrinkle when you glue them.
If you want to buy one thing, make it a good glue stick or good tape. The rest will come, page by page.
Questions about this topic
What do you need to make a junk journal?
A base, such as an exercise book, an old book cover or your own folded signatures, a pile of paper you'd otherwise throw away, something to stick things down with and a quiet afternoon. You don't need to buy anything.
How do you sew a signature into a junk journal?
Make a piercing guide with three holes and pierce through all the sheets and the spine of the cover. Start on the inside at the middle hole, come back in through the top hole, run along the inside to the bottom hole and go out again. Finally, go back in through the middle hole and tie the ends either side of the long stitch.
How do you stop a junk journal getting too thick?
Make room beforehand by tearing leaves out of an existing exercise book, keep your signatures thin and spread bulky things across the whole book rather than piling them onto one spread. Close the book with a ribbon or elastic band.
What materials can you use in a junk journal?
Anything made of paper or fabric that is pretty or holds a memory and that you'd otherwise throw away: envelopes, tickets, book pages, packaging, ribbon and leftover patterned paper.