· 7 min read
How to make a calm, natural-looking collage in your journal
Scraps of paper, pictures, stickers and tape: how to build a collage that hangs together instead of looking messy, and how to stick it down without wrinkles.
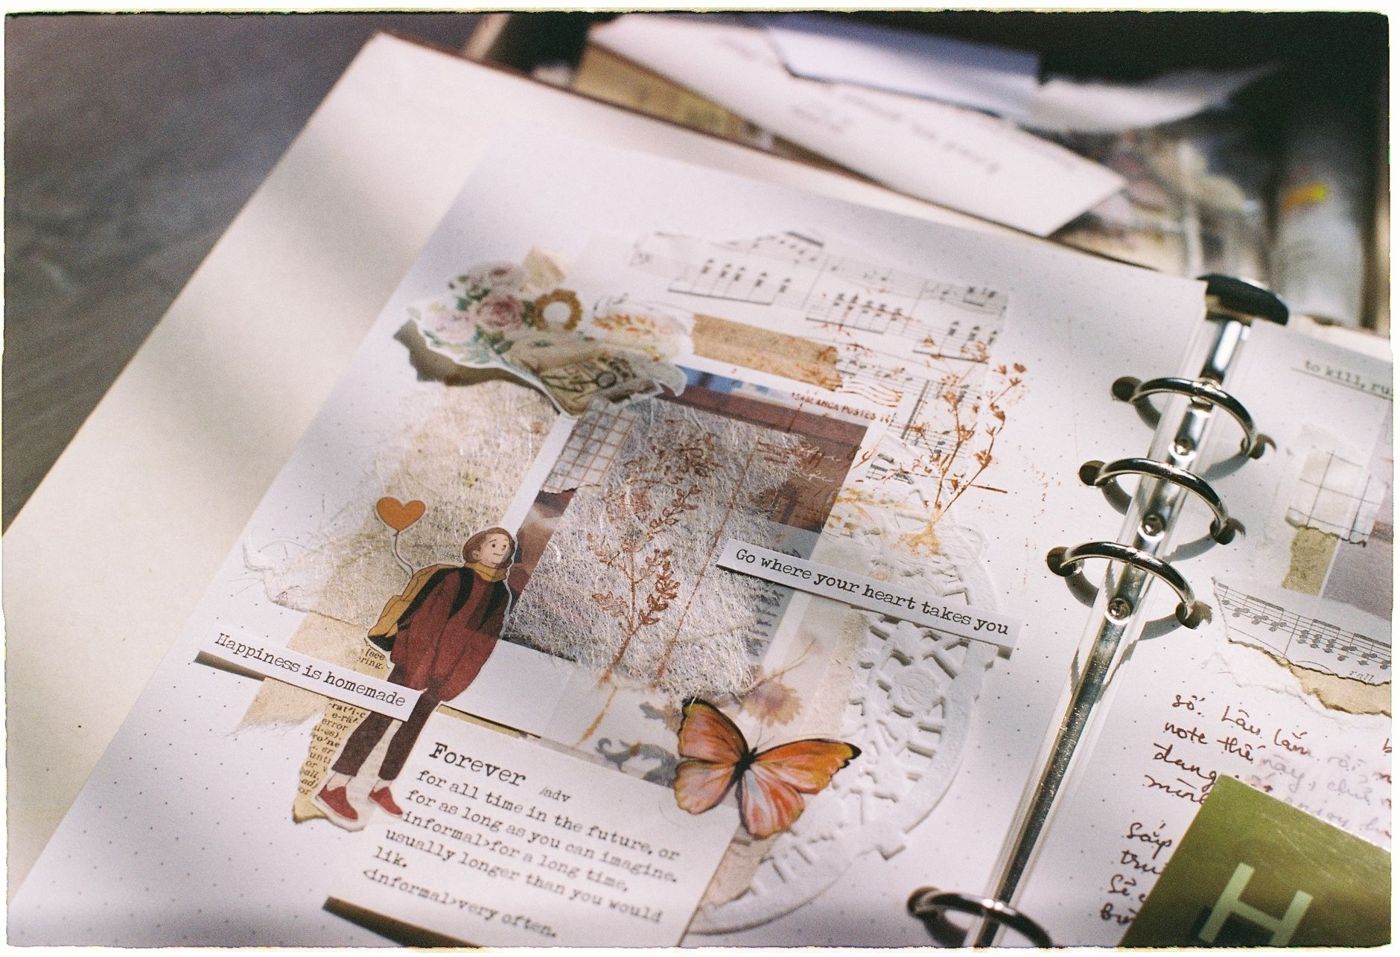
A collage in your journal looks simple: cut, arrange, stick. Yet it often ends in a page that feels busy, or in paper that's full of wrinkles once it dries. With a set way of building it up, a few choices made in advance and the right way of gluing, you'll get collages that look as if they simply grew that way.
What materials to collect
Almost anything flat can go in. Think magazines and leaflets, old book pages, sheet music, wrapping paper, paper bags, envelopes with a pretty lining, wallpaper samples, misprints, tickets, receipts, labels and leftover patterned paper. Add stickers, washi tape (thin paper tape with a print) and perhaps a stamp or a pen.
Work with copies if you want to use old photos or precious papers. The original stays safe, and you won't hesitate to cut into it.
Collect everything in a box or folder, and now and then sort your stash by what it does on a page. That helps more than sorting by colour or theme. A handy way to divide it:
- Focal images: a figure, an animal, a building, a flower. Something the eye is drawn to.
- Backgrounds: calm patterns and blocks of colour, such as checks, text or a plain colour.
- Pictures: complete scenes that can work as either background or focal image.
- Accents: small things you use in groups, such as little stars, flowers or numbers.
- Lines: strips of tape, borders and narrow strips of paper that divide up the page.
Keep the leftovers too when you cut out stickers. Stick them on a sheet of baking paper or in an old exercise book for now, so you have them to hand.
Building a collage: background, focal image, details
Work from back to front, in three layers.
- Background. Choose one or two calm papers as a base. They can overlap and don't need to cover the whole page. A strip of tape or a torn edge already adds structure.
- Focal image. Choose one thing to play the lead and give it the most space. It doesn't have to go in the middle; slightly off-centre often feels livelier.
- Details. Add accents, lines, a few words and perhaps a ticket around the focal image. This is where the mood lives, but also where the risk of too much lies.
Lay everything out loose first, without glue. Take a photo, move things around, take another photo and compare. In a photo you'll see more quickly what feels too heavy or where there's a gap. If you're not sure, walk away for a bit and look again later.
Then glue in the same order: everything at the bottom first.
How to make it look natural rather than messy
The difference between a collage that works and one that feels messy is rarely in the materials. It comes down to a few choices.
- Limit your colours. Two or three main colours plus a neutral shade is enough. Let the colours from your focal image come back in the background.
- Choose one lead. If everything is the same size and equally eye-catching, the eye doesn't know where to look.
- Group your accents. One lone star looks lost. Three or five together, each slightly different in size, look like a deliberate choice, like sprinkles on an ice cream.
- Let edges show. Overlaps, tears and small shifts add depth. Don't try to smooth away the differences between papers.
- Mix textures. Smooth next to rough, light next to dark, glossy next to matt.
- Leave some breathing space. A bit of empty page makes the rest stand out more.
- Repeat something. The same tape, colour or shape in two or three places ties the page together.
And know when to stop. Add details step by step and look after each step. If you're wondering whether it needs something more, the answer is usually no.
Techo collage with washi tape and stickers
Techo is the Japanese word for a diary or notebook. A techo collage is a small, layered collage made mainly with stickers, washi tape and cut-out bits of paper, often in a planner or a slim notebook. It's a lovely format when you're short on time, because you need hardly any glue.
Here's how to go about it:
- Start with a few strips of washi tape or a piece of paper as a base.
- Stick a larger sticker or a cut-out picture on top as your focal image.
- Place smaller stickers and words partly over it, so the layers interlock.
- Finish with a stamp, a date or a few handwritten words.
Pick up stickers with tweezers. That way no fingerprints or skin oils get on the adhesive, and you can place them precisely. If a sticker is see-through and you don't want that, stick it on white paper first and cut it out again.
Stickers are handy, but pictures you cut out yourself from magazines and leaflets make a collage more personal. A mix of both often works best.
Which glue prevents wrinkles
Wrinkles are caused by moisture. Wet glue soaks into the paper, the fibres swell and dry in little ripples, usually along the grain of the paper. The thinner the paper, the faster that happens. Magazine paper is notorious for it.
A few ways to prevent it:
- Use only as much glue as you need. Too much glue dries unevenly and causes bumps.
- For thin paper, a dry glue stick or double-sided tape often works best.
- If you use wet glue or an acrylic medium on thin paper, apply it to the base rather than to the paper itself.
- Smooth from the middle outwards with an old card or a bone folder, and wipe away any glue that squeezes out straight away.
- Make sure the edges are firmly stuck down. A loose edge catches and curls up.
- Work on baking paper or an old magazine whose pages you throw away as you go. Glue doesn't stick to baking paper.
- Let the page dry under a few heavy books, with a sheet of baking paper in between.
Don't use superglue or a glue gun for paper; they don't work well on it. Stick heavy things such as buttons with a thick craft glue. You can read more about which glue suits photos best in the article on glue for photos and paper.
Small grid collages without the stress
A full page can feel paralysing. So start small. A collage on a postcard-sized card or smaller is done in half an hour, and if it doesn't work out you can throw it away without regret. If you work on loose cards, you can arrange them in a ring binder or folder later.
A grid makes it even easier. Draw a few equal boxes on your page in pencil, for example three by three or two by four. Each box becomes a mini collage with one small focal image and a few details. Because the boxes already bring order to the page, the whole thing looks calm, even if every box is different.
A few ideas for a grid:
- A week in nine boxes: a ticket, a sticker or a word for each day.
- A colour grid: each box in one colour, from light to dark.
- A travel grid: tickets, receipts and a bit of map in each box.
Keep the edges of the boxes straight and the white space between them even. That little bit of neatness stops the playful content from looking messy.
If you'd rather make a stack of backgrounds first, fill a sheet with overlapping scraps of paper. You can later cut this paper patchwork, also known as frankenpaper, into boxes, cards or borders. That way there's always something ready when you feel like sticking.
Questions about this topic
How do I make a journal collage that doesn't look messy?
Limit yourself to two or three main colours, choose one lead and group accents in odd numbers. Leave some empty space too, so the photo and details stand out more.
How do you glue paper without it wrinkling?
Use only as much glue as you need, smooth from the middle outwards and make sure the edges are firmly stuck down. For thin paper, a dry glue stick or double-sided tape often works best.
What is a techo collage?
A small, layered collage of stickers, washi tape and cut-out bits of paper, often in a planner or slim notebook. You need hardly any glue, so it's lovely when you're short on time.
How do I start small with collages in my journal?
Make a collage on a postcard-sized card or smaller, or draw a grid of equal boxes and turn each box into a mini collage. It's done in half an hour.