· 8 min read
Alcohol markers: how they work and which paper you need
Alcohol markers give soft, smooth colour blends, but only on the right paper and with the right stamping ink. Here's how to get the most out of them.
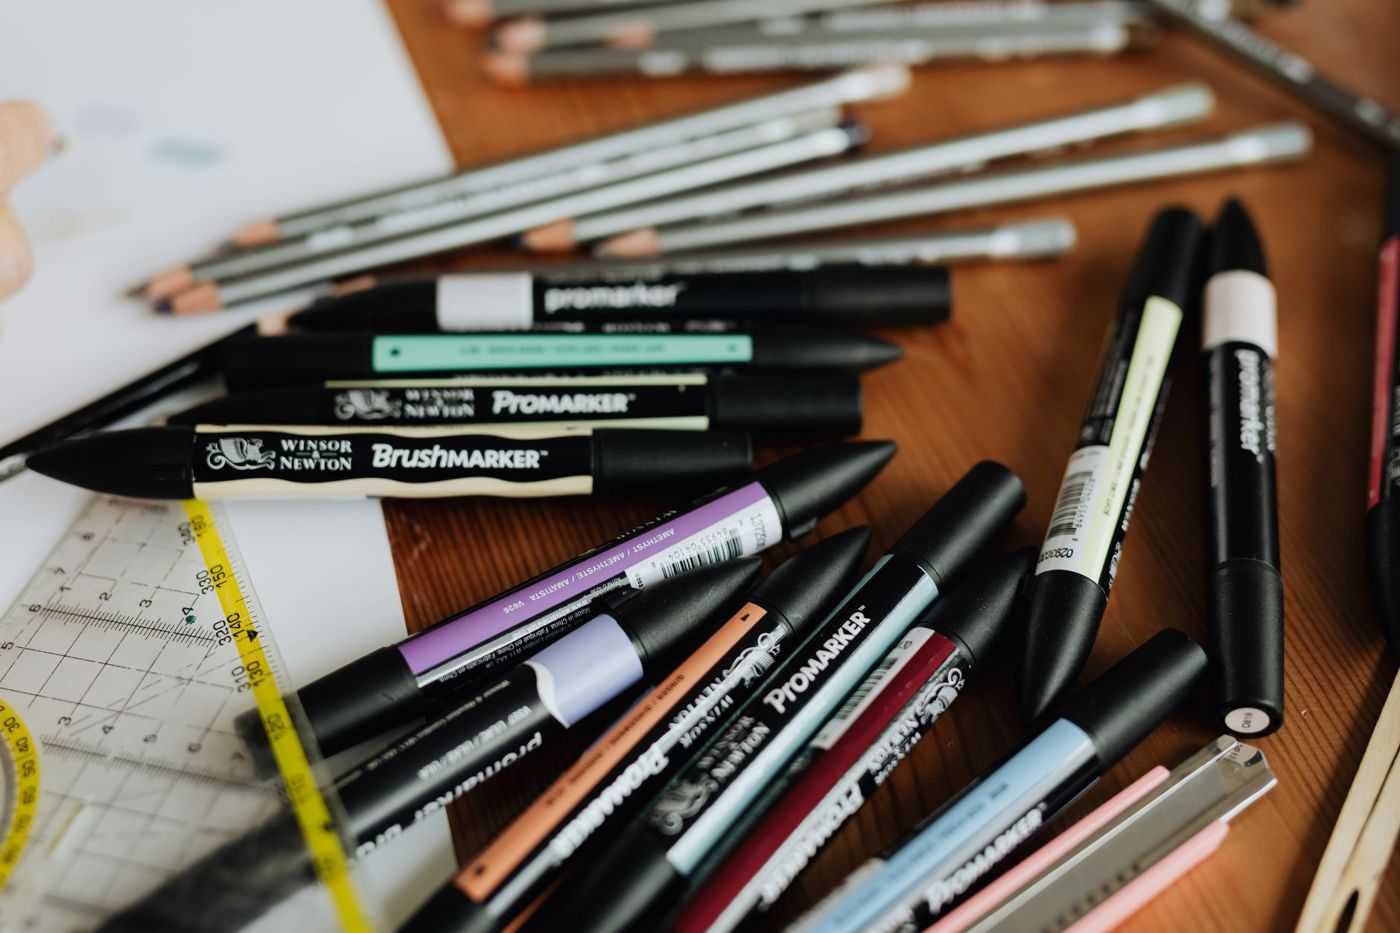
If you've ever watched a stamped flower come to life under a few markers, you'll understand why scrappers love them so much. Alcohol markers give colour gradients that look as if they've been printed. At the same time, they're expensive, they smell, and on the wrong paper they bleed all over the place. Here you'll read how they work, what to put underneath and how to blend without streaks.
What makes alcohol markers different
An alcohol marker contains dye dissolved in alcohol. As soon as the ink touches the paper, the alcohol evaporates and the colour stays behind. That happens quickly, the ink is waterproof afterwards and it's transparent. If you lay a second colour over the first, you can still see the bottom one through it.
The big advantage is blending. As long as the ink isn't completely dry, a new layer dissolves the previous one slightly. That lets colours flow into each other without hard edges. Most alcohol markers have two tips: a flexible brush tip for blending and a firm, narrower tip for details and small areas.
A water-based marker works differently. The ink soaks in more slowly, settles into the fibres and easily leaves streaks where your lines overlap. Go over it too often and the paper starts to pill. On the other hand, you can blend water-based markers out with a wet brush, a bit like watercolour. They don't smell, they're cheaper and they're fine for lettering and freehand drawing.
In short: for smooth colouring of stamps and soft shading, alcohol markers are stronger; for lettering and loose, watery effects, water-based markers will do. What alcohol markers do need is a well-ventilated room. Open a window during a long colouring session.
Paper that doesn't bleed or blotch
The paper largely decides how your colours look. Alcohol ink takes the path of least resistance and spreads into loose fibres. You'll see that straight away on copy paper: the colour fans out past your line and soaks through to the back.
What to look for:
- Smooth and dense. A closed surface keeps the ink together, so your edges stay crisp and you can blend. Rough or soft paper soaks up the ink and leaves blotches.
- Sturdy enough. As a rule of thumb, paper from around 120 gsm holds more ink without buckling. Many scrappers colour on smooth cardstock (sturdy, plain card) of around 250 gsm.
- Made for markers. There's paper and card made specifically for alcohol markers, often with the name of a marker brand on it or a term like blending card. That's the easiest choice when you're starting out.
- Uncoated. Glossy photo paper or coated patterned paper doesn't let the ink soak in properly.
Expect alcohol markers to almost always soak right through to the back. So always put a scrap sheet or a piece of card under your work, or you'll colour your table or the next page too. That's also why it's better to colour on a separate piece of card that you then stick onto your page, rather than straight into an album. In a notebook or journal, use only one side of the page.
Kraft paper, that brown card, works too, but colours come out darker and less bright on it. On a special plastic paper such as Yupo, which doesn't absorb the ink at all, you get a glossy, flowing effect instead. That's lovely for a background, but it's a different kind of work from colouring stamps.
Blending without streaks
Streaks appear when the ink is already dry before you make the next stroke. The fix is mainly: enough ink and a brisk pace.
- Choose two or three colours from the same family that sit close together, for example light, medium and dark pink. The smaller the difference, the softer the transition. That's why many brands sell small sets of three related shades.
- Lay down a base over the whole area with the lightest colour. Work in small circles or short overlapping strokes, and make sure the paper gets properly wet.
- Put the darkest colour on the shadow side: where the light doesn't reach. Decide beforehand where your light source is, for example top left.
- Go over the border between light and dark with the middle colour, so that it fades.
- Finally, go over the whole area again with the lightest colour. This pulls the colours into each other.
A few things that help:
- Fill one area in one go, so the edge doesn't dry in between.
- Don't colour right up to the line with a wet brush tip. The ink creeps further than you think. Start a little away from the line and let the ink fill the last millimetre by itself.
- If you want a flat area with no gradient, colour in small circles and keep going until there are no dry spots left.
- Many brands have a colourless blender: a marker with only the solvent. You can use it to soften a transition or lighten a tiny mistake a little. You can't erase with it, so think of it as a helper, not a rubber.
Coloured pencils are a handy extra. Use them over the dry marker colour to add extra shading or fine lines. A white gel pen adds highlights in eyes or on shiny spots.
Trying things out on scrap paper isn't a waste of time. Make a colour chart of your own markers on the same paper you colour on: the colour on the cap doesn't always match what appears on the paper.
Which ink for stamps you colour in
If you stamp an image and then colour it in, the stamping ink has to be alcohol-resistant. Otherwise the black line dissolves as soon as you go over it with a marker, and you drag grey smudges through your colours.
Choose an ink that the manufacturer explicitly says is suitable for alcohol markers. This is often a fast-drying water-based ink. Memento is a well-known example that many card makers use for this. Let the stamped image dry properly before you start colouring.
Solvent-based ink, meant for plastic and glass, can actually bleed under alcohol. Pigment ink dries slowly on smooth card and can smudge, unless you heat emboss it with embossing powder. Not sure about your own ink? Stamp a test, let it dry and go over it with a light marker.
Prefer colouring digital stamps, such as an image you print yourself? A laser print usually stays put. Inkjet ink can bleed, so test that first too.
Expensive and cheap sets compared
Alcohol markers come in every price range, and the difference isn't just in the name.
More expensive brands, such as Copic, sell their markers individually, so you buy exactly the colours you're missing. They're refillable, the tips can be replaced and a colour stays the same when you buy it again. That makes them expensive to buy, but they last for years.
Cheaper sets, for example from Ohuhu, give you lots of colours in one go for little money. The ink is often fine, but the brush tip is sometimes stiffer, single colours can't always be bought again, and refilling or replacing a tip usually isn't possible. Brands such as Promarker sit in between.
What works for most beginners:
- Start with a small number of colours instead of a set of seventy. Better three skin tones, three greens and a few greys than one of everything.
- Choose sets with related shades, so you can start blending straight away.
- If you find you do it often and certain colours run out quickly, buy those in a refillable brand.
Whether they're worth the money depends on how often you colour stamps. If you make a card now and then, a cheap set is enough. If you colour every week, refillable markers pay for themselves.
Refilling and storing
An alcohol marker that dries out usually isn't broken, just empty. Many brands have refill bottles in the same colour. You drip the ink onto the tip or into the barrel, depending on the brand; follow the manufacturer's instructions. With those brands, you can also replace worn tips. That's cheaper than a new marker and it saves waste.
When it comes to storage, three things matter:
- Cap on properly. If you don't hear a click, the alcohol evaporates and the tip dries out.
- Store them flat. With dual-tip markers, this stops all the ink sinking to one end. A simple rack or a box where they lie flat side by side works fine.
- Cool and out of the sun. Heat speeds up evaporation, so not on the windowsill or next to the radiator.
Sort them by colour family and keep your colour chart with them. That way, when you're blending, you can quickly grab the three shades that belong together, and you'll see straight away which ones you're missing.
Questions about this topic
What paper do you need for alcohol markers?
Smooth, dense, sturdy paper, ideally made for markers. Cardstock of around 250 gsm is a popular choice, and a scrap sheet underneath stops the ink reaching your table.
How do you blend alcohol markers without streaks?
Choose two or three related shades, work with enough ink at a brisk pace and put the darkest colour in the shadow. Streaks appear when the ink is already dry before you make the next stroke.
What stamping ink works with alcohol markers?
Choose an ink that the manufacturer explicitly says is suitable for alcohol markers, often a fast-drying water-based ink. If you're not sure, stamp a test, let it dry and colour over it with a light marker.
Can you refill alcohol markers?
With many of the more expensive brands, yes: there are refill bottles and replaceable tips. Cheaper sets usually can't be refilled.